


BLENDING OLD COLOUR AND NEW B&W IMAGES - BLENDING MOSAIC IMAGES - UNSHARP MASKING IN GIMP 2.10.38
For years I have used Photoshop
to do proper layered unsharp masking on certain astro photos. It allows
astronomical objects with bright centres/areas to be enhanced to show
faint outer areas while grafting the brighter areas back without over
exposing them. After my old PC died, I went to a Windows 11 system and,
of course, Photoshop won't function correctly. So, I installed the
latest version of GIMP 2.10.38.
I had tried to unsharp mask in older versions of GIMP without success.
Searching online for a routine proved fruitless, only finding references
to the unsharp mask filter, which is not what is required here. So, I
set about working it out for myself. It took several hours of
experimenting but I nailed it... here's how it's done.
(* I just tried in new GIMP 3.2.4, they have changed things so this does
not work now ?!%#?, so went back to 2.10.38... it wasn't broke!)
Simply enhancing certain images with Levels or Brightness-Contrast adjustments burns the bright areas out.
* An alternative to this method, is to take two images, one short exposure and one long exposure.
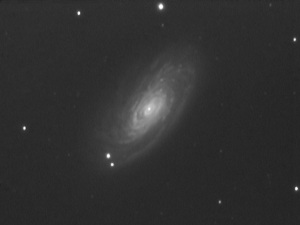
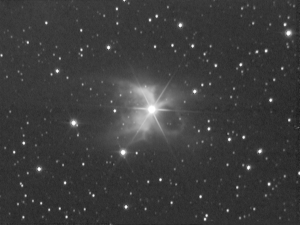
Original Image
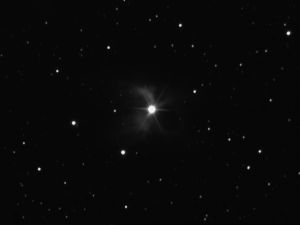
Stretching the levels shows the faint areas...
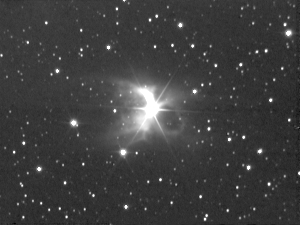
but burns out the star and brightest part of the nebula.
So, the following Unsharp Mask routine using layers solves that.
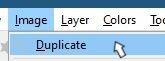
Open your Original Image (as above).
Click Image Menu, Duplicate.
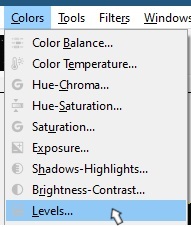
On the duplicate open Colors,
Levels...
adjust the sliders to bring out faint stuff, this will burn out the
bright areas, and press OK. 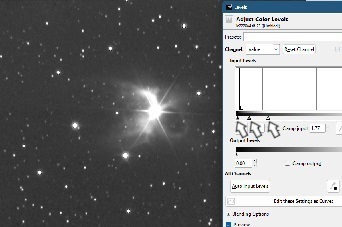
Click on original image 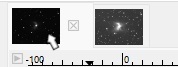 ,
,
select all, copy (Ctrl a, Ctrl c)
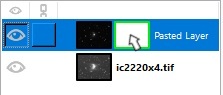
Click duplicate image 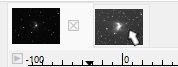 , paste (Ctrl v),
Right click on Floating
Selection, click To New Layer 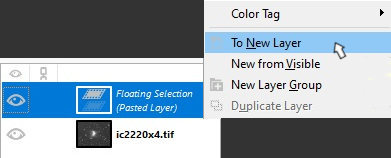
*Note. If you are using a separate short exposure image, it may need aligning to the base layer before you proceed.
Right click again on pasted
layer, Add Layer Mask... 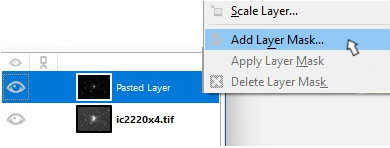 ...
...
in the box, white (full opacity) is already selected, click Add.
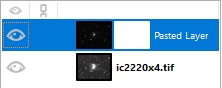
The layers will look like this.
Click back on duplicate layer 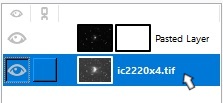 ,
,
select all, copy (Ctrl a, Ctrl c).
Now, while holding the Alt Key
down,
click the mask box (main image goes white, release the Alt Key)
 , then paste (Ctrl v),
Right click on Floating
Selection, click Anchor Layer 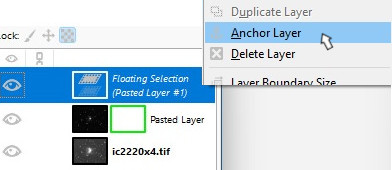
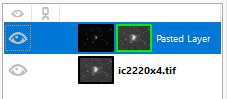
Layers should now look like
this.
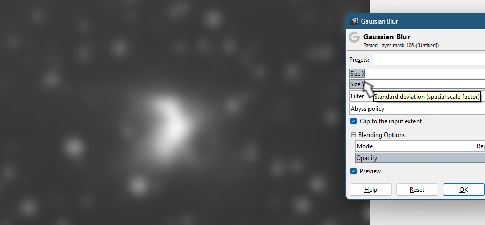
Open Filters, Blur, Gaussian
blur… 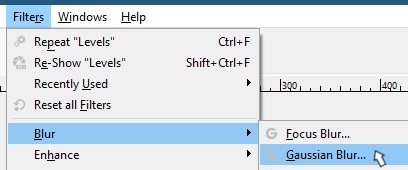
adjust the sliders to blur the image (you'll need to experiment with different images, by how much) and press OK.
Click Layer, Mask, Apply Layer
Mask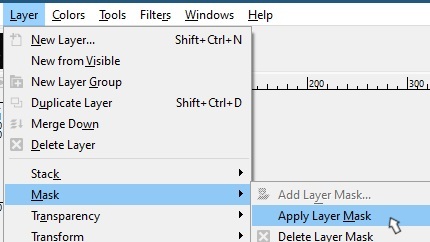
You will see the image change. It now shows the interaction of the two images through the unsharp mask layer.
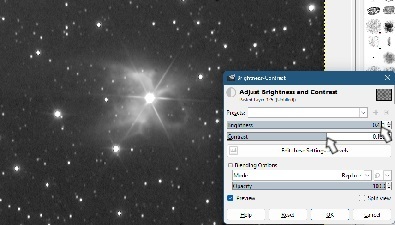
Open Colors,
Brightness-Contrast... 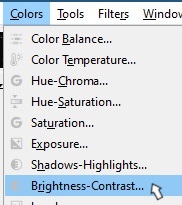
Adjust levels to suit and press
OK.
Right click pasted layer, Flatten Image 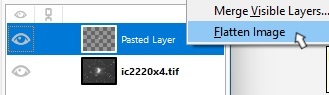
Save file as new file... *object*-um.jpg
Your image will now show the
faint background nebula and a clean star and bright nebula.
+
= 
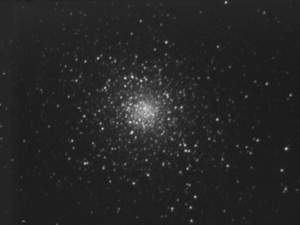
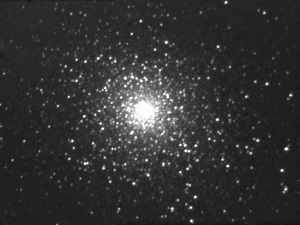
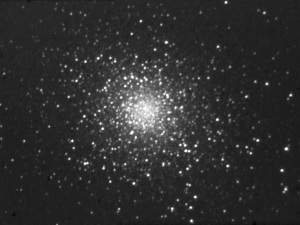
Another example on Globular
Cluster Messier 5
 +
+  =
= 
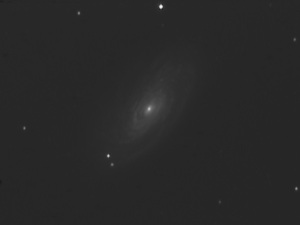
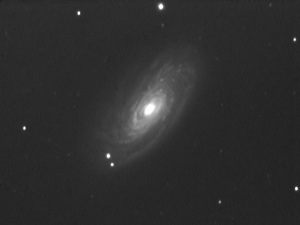
and Messier 77
 +
+  =
=