


BLENDING
OLD COLOUR AND NEW B&W IMAGES - BLENDING
MOSAIC IMAGES - UNSHARP
MASKING IN GIMP 2.10.38
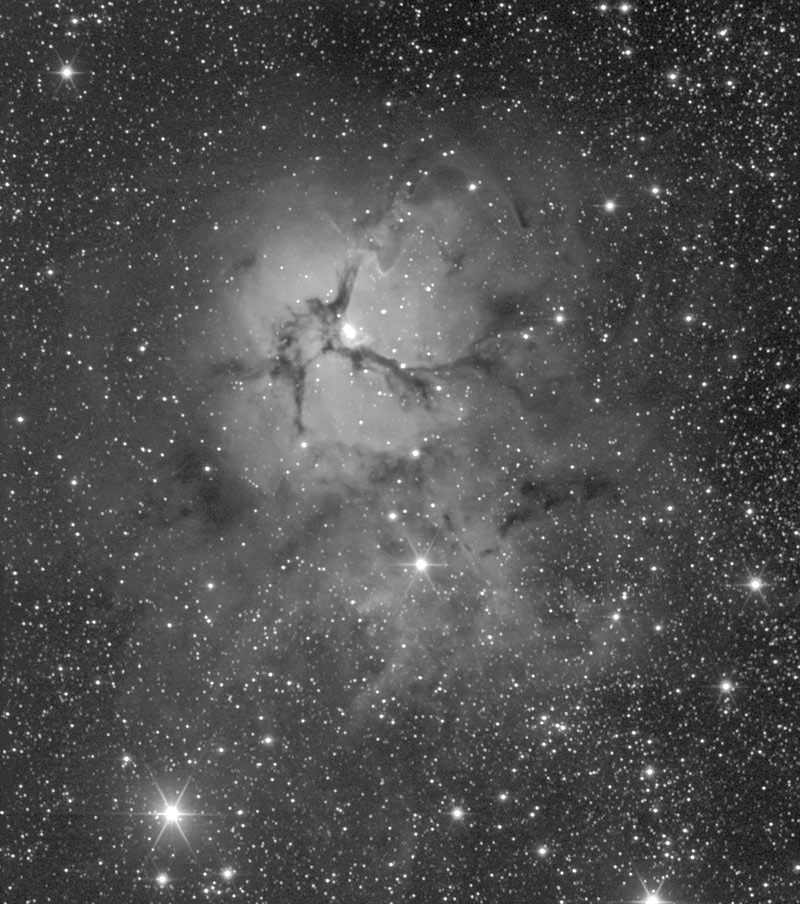
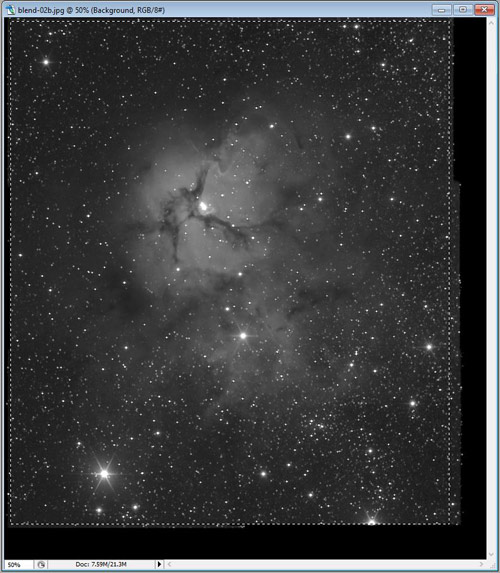
Here we see the 'Trifid' Nebula, Messier 20, in a single frame using a 31 cm f/5 reflector and GSTAR-EX video camera, it doesn't quite get it all.
Taking multiple frames to build a mosaic will show a wider view while maintaining the high resolution of the telescope and camera.
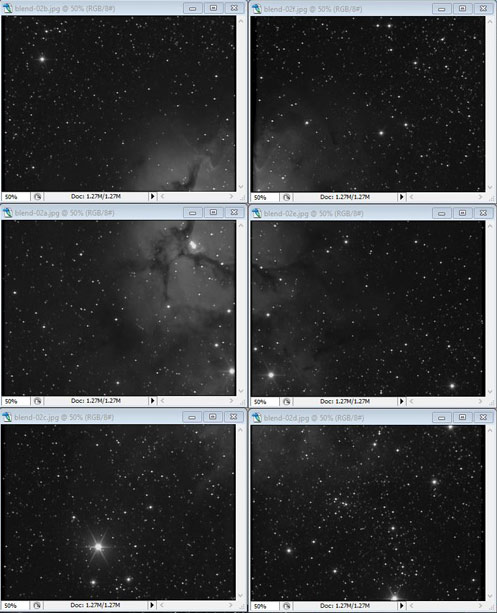
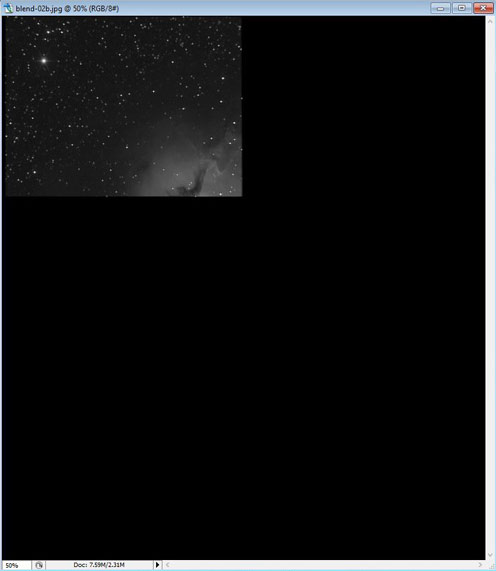
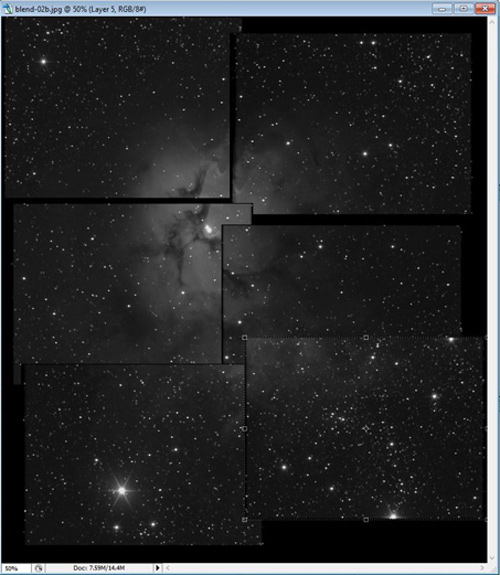
For this example we will use 6 images to create a mosaic 2 fields wide x 3 fields high.
Photoshop CS2 is used for this demonstration but other image software capable of working with layers can be used with similar techniques.
The same techniques can be applied to any number of images.
It is important that your base images have a consistent background tone by having correct dark-frame and/or flat-fields applied in their initial processing.
Open all your images and use the
Zoom Out command ( +
+  +
+  keys) and size each of them so they will
all fit on your work-space and arrange them in their logical positions.
keys) and size each of them so they will
all fit on your work-space and arrange them in their logical positions.
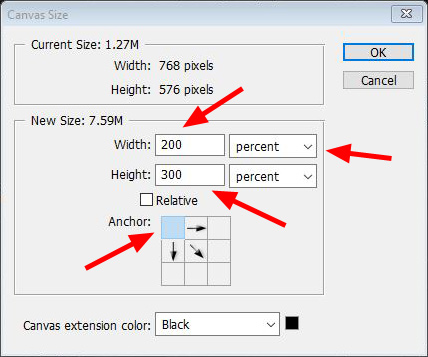
Select the top left image and right click on its title bar, left click on Canvas Size to open that dialog box.

Change the top Unit box to Percent (the other one will change automatically) and change the 2 values to 200 Wide and 300 High. Select the anchor point as the top left box so the canvas expands down and to the right from this image. For mosaics with more fields, adjust the percentage increase accordingly. e.g. a 4 x 3 mosaic will need a canvas 400% wide and 300% high.
The canvas should now look like
this. You can use the Ctrl, Alt, + or - buttons to enlarge or shrink the
frame to suite the work space.
Zoom out to see the big picture and in to get close-up for fine work.
Now, using the move tool 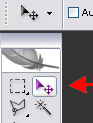 ,
select each of the other images and drag them to the expanded canvas of
the top left image.
,
select each of the other images and drag them to the expanded canvas of
the top left image.
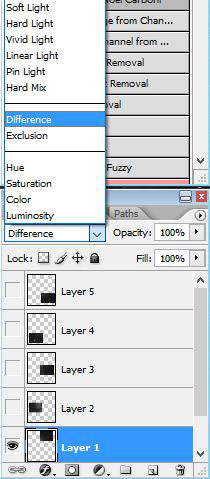
You can make each layer visible
or not by turning the eye button on or off. 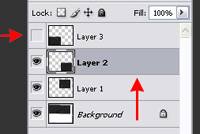 To make a layer active for moving or processing, select the layer box.
The next step it is easier to hide the other layers and just show the two to be merged.
In the Layers Blending Mode box, select Difference as the blend mode. You will see where the stars are not aligned in the overlapping area.
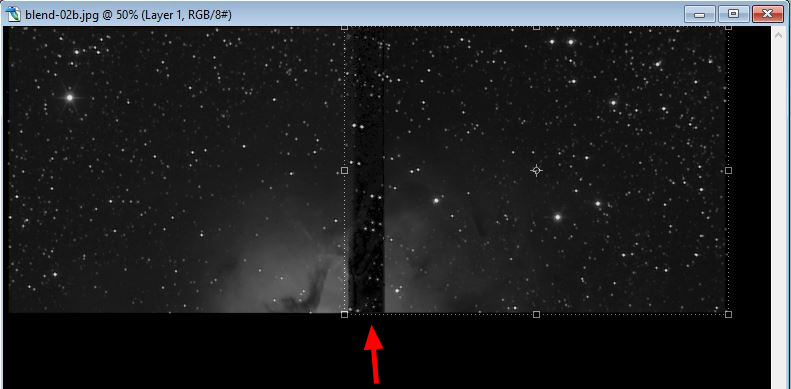
Use the Move tool
to drag the images closer to alignment and the cursor keys  to fine tune the movement pixel by pixel. If the field is rotated
slightly, you can use the corner tabs to correct the angle by rotating
the layer around the pivot point indicator. Even a distorted field can
be corrected by holding the Control Key and moving the corner tabs. *
When making either of the later 2 adjustments, double click the layer to
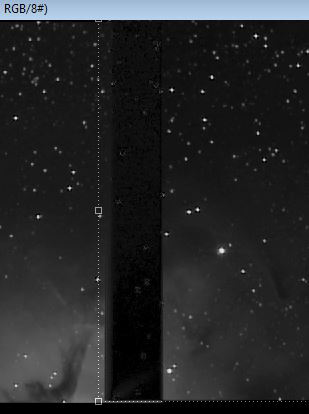
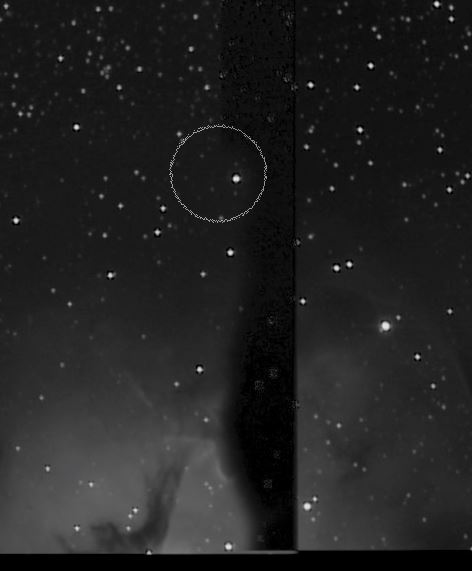
accept the changes or press the 'Enter' key. When aligned the stars will
null out as shown to the right. Don't worry about any really small
misalignment.
to fine tune the movement pixel by pixel. If the field is rotated
slightly, you can use the corner tabs to correct the angle by rotating
the layer around the pivot point indicator. Even a distorted field can
be corrected by holding the Control Key and moving the corner tabs. *
When making either of the later 2 adjustments, double click the layer to
accept the changes or press the 'Enter' key. When aligned the stars will
null out as shown to the right. Don't worry about any really small
misalignment.
Now select the Eraser tool 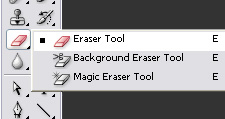 ,
,
Right click on the image to call the Eraser tool settings box and set to
a medium size with softest edge ( Hardness: 0%)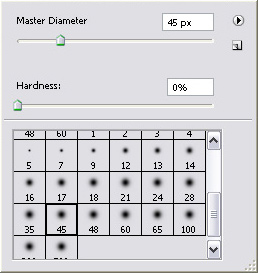
Rub out the hard edge of the overlapping image. Make sure to get the full length of the image but be sure not to erase too close to the edge of the underlying image. Try not to have the overlap passing through any bright stars.
Now set the Layers Blending Mode box back to Normal

Repeat this procedure with the
other images to complete your mosaic.
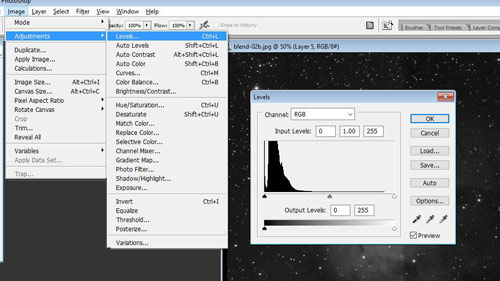
To bring out all the information in the images, open the Levels dialog
box. Menu - Image - Adjustments - Levels...
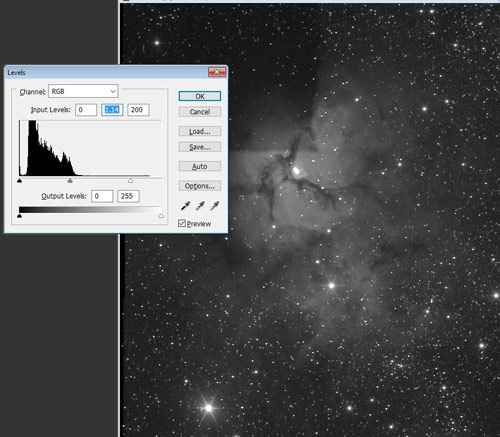
Adjust each image layer separately to enhance stars, nebula etc. and importantly, make sure that the tone, brightness and contrast matches all other frames.
When you are happy with how the images are merged, use the Layer - Flatten Image command to merge it all together.
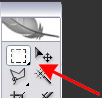
Use the Rectangular Marquee Tool
 and select the area to be cropped around,
then use the Image - Crop command to cut the excess image and canvas
away.
Perform your usual final contrast and tonal adjustments ...
You will have created a nice
wide field image that retains high resolution .