


SEESTAR S50 SMARTSCOPE
from ZWO - Introduction
My Seestar S50 Images in categories:
Stargazing Single Frames, Stargazing Wider fields and Mosaics, Solar System, Scenery
Having gone through the experience of imaging the night sky using lens and telescopes and evolving from film, to digital SLR camera, and electronic sensors, getting a smartscope has really changed the game.
When a friend first told me
about the Seestar S50 and I looked at the web pages, I thought naaaa,
that's too good to be true.
Yep, I've had to eat my words.
This thing is bloody amazing... and its just a 2 inch diameter
telescope.
That's smaller than the telescope I started with over 40 years ago!
As long as you are not trying to win an astro-imaging competition, this little scope will reveal just about anything you want... and do all the hard work for you. So, its ideal for beginners to dive in the deep end and produce some amazing images of objects in the night sky.
The Seestar S50 is made by the
ZWO company and retails less than $1000.
I have no affiliation with this company, I just think its an amazing
product worth talking about.
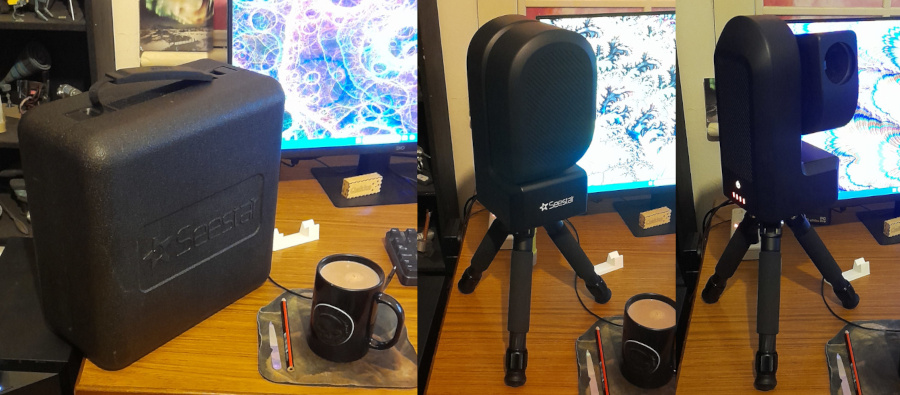
Apart from your smart phone or
tablet, everything you need to get started is in the small tough foam
carry case.
There is a 50mm diameter f/5, 3 element (apochromatic) refractor, a
sturdy tripod, Solar filter, and USB A to C cable.
It has built-in options for auto focus, a dew heater and dual-band
OIII/Ha filter, ideal for light polluted suburban skies.
It is all controlled via WiFi or Bluetooth from the Seestar app you
install on your device.
The software is periodically being upgraded in response to users wishes.
The camera uses a Sony IMX462
chip with a resolution of 1920 x 1080 pixels, perfectly suited to a
smart phone screen.
This gives an actual Field of View (FOV) of 1 degree 17 minutes High x
43 minutes Wide.
The S50 was originally designed to work in Alt-Az mode but later software updates allow Equatorial (EQ) mode as well.

The app has 3 imaging modes:
Stargazing, Solar System and Scenery.
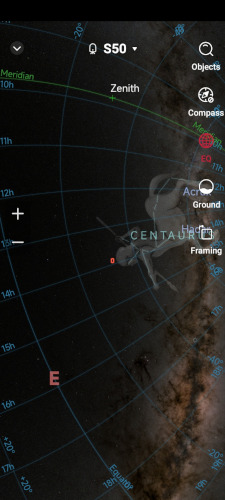
In Alt-Az mode, after leveling and compass calibration using the app, it can find objects from the built-in sky map.
 ... and zooming in
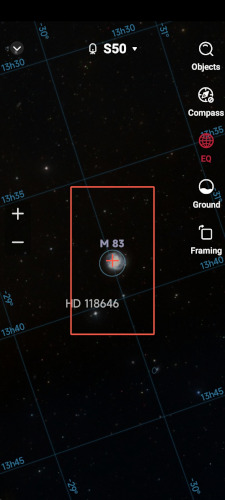
Start recording and it builds up the image for as long as you want.
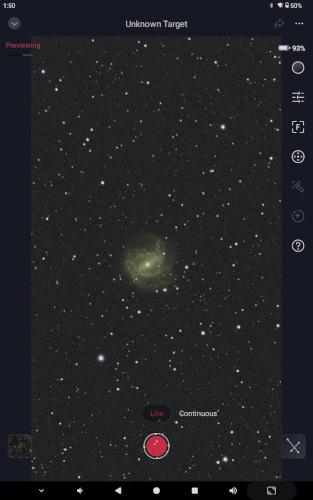
Recording in Stargazing mode,
the S50 starts taking 10 second exposures.
It then stacks them, compensating for tracking drift and field rotation.
Bad frames are rejected automatically.
A limitation of tracking in
Alt-Az mode is field rotation, this gets worse high up in the sky and
especially crossing the meridian.
Generally, Alt-Az imaging is recommended when targets are below 65
degrees elevation.
The latest version of the app
allows for Equatorial mode which overcomes the field rotation and high
target issues.
You can now track objects high up and through the meridian which is the
best place to image deep sky objects.
There is even help in the app to fine tune the polar alignment of the
mount.
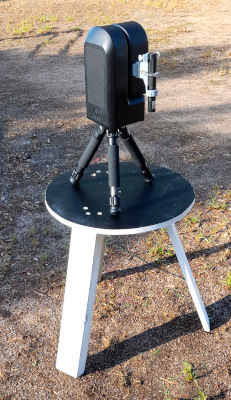
For a quick setup for solar
observing, I put the Seestar on a pier with a fine tune leveler.
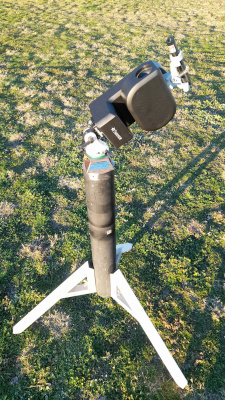
For EQ observations, I removed my Skywatcher Star Adventurer EQ head and
put the S50 on the wedge which works really well.
I also mounted a laser pointer to the S50 to more easily point to
objects to sync the star map to, if needed.
Once synced, it points accurately all over the sky for the rest of the
session.
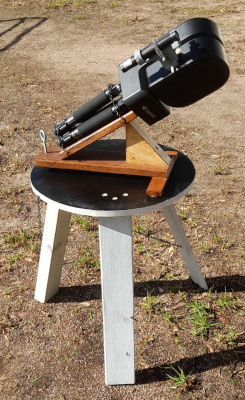
As an experiment, I also made a simple EQ wedge from wood that utilises
the S50 tripod, this also works really well.
An adjustable round top tripod makes a good stand on uneven ground for
both modes.

What an amazing little device... 2 inches in diameter!
My Seestar S50 Images in categories:
Stargazing Single Frames, Stargazing Wider fields and Mosaics, Solar System, Scenery

